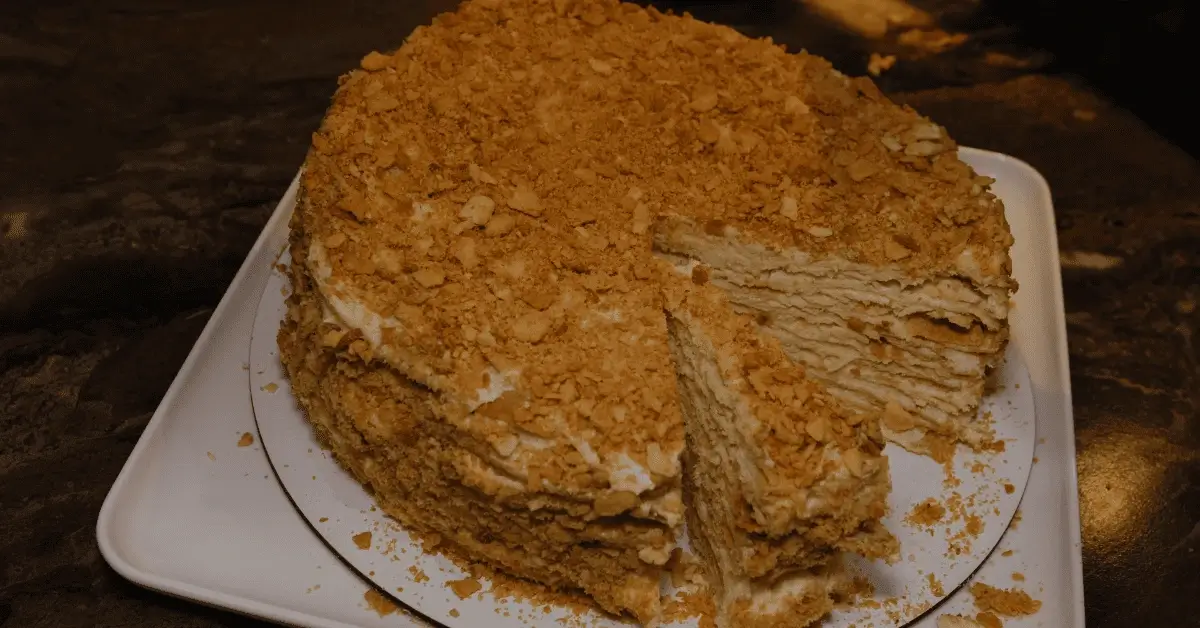
If you’re a fan of desserts that are both indulgent and surprisingly simple to make, this Mil Hojas cake is about to become your new favorite recipe. With its thousand layers of crisp, buttery dough, each bite delivers the perfect combination of flaky texture and sweet, creamy filling. Imagine layers of dulce de leche nestled between delicate pastry, creating a dessert that’s both satisfying and elegant. Whether you’re baking for a special occasion or just to treat yourself, this Chilean cake brings a unique, traditional touch to any table. Ready to dive into the layers of sweetness? Let’s get started!
Table of Contents
1. Why You’ll Love This Mil Hojas Cake Recipe
Making Mil Hojas cake at home might sound like a challenging task, but trust me this recipe is as easy as it is delicious! Whether you’re a seasoned baker or a newbie in the kitchen, you’ll love how simple yet rewarding it is to create this traditional Chilean cake. Here’s why:
- Layers of perfection: The beauty of Mil Hojas lies in its delicate layers. Each bite offers a crispy crunch, thanks to the flaky dough that you roll out and bake to golden perfection. With every layer, you’ll discover a new level of satisfaction.
- Dulce de leche magic: The rich dulce de leche filling is the star here. Sweet, creamy, and smooth, it’s the perfect contrast to the crisp dough. The caramel flavor melds so beautifully with the texture of the layers, making this cake an irresistible treat.
- Quick and easy: Yes, this cake is quick and surprisingly simple to make, even for beginners. While the dough needs some chilling time, the hands-on effort is minimal. Once it’s out of the oven, you’ll have a show-stopping dessert ready to enjoy.
- Customizable: Feel free to add your twist! Want a nutty flavor? Sprinkle in some chopped walnuts for extra crunch. Looking for a little more sweetness? A light dusting of powdered sugar on top will elevate the presentation and taste.
- Perfect for any occasion: Whether it’s a casual weekend treat or a centerpiece for a festive gathering, this cake fits every occasion. Its elegance and deliciousness make it a crowd-pleaser, sure to impress both family and guests alike.
Once you try making Mil Hojas, you’ll understand why this is a go-to Chilean dessert. It’s everything you want in a cake easy, flavorful, and full of delightful layers. Now that you know why this recipe is a must-try, let’s get started on the ingredients and instructions!
2. Essential Ingredients for Mil Hojas Cake
Before you dive into making your Mil Hojas cake, let’s take a look at the key ingredients that will help you create this delicious dessert. Each one plays a crucial role in making this Chilean cake truly irresistible. Here’s everything you’ll need:
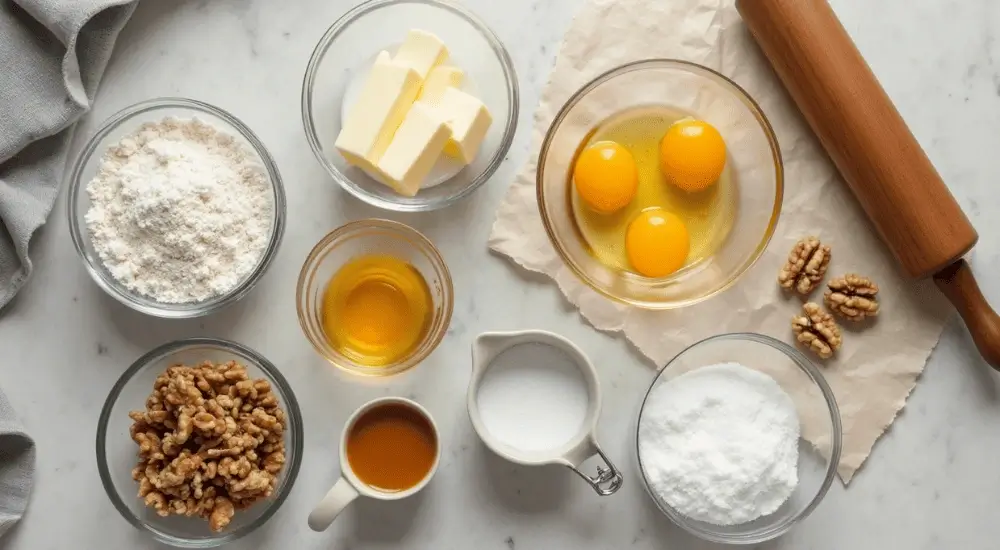
For the dough:
- 3 cups sifted flour – This is the base of your dough, and sifting helps to achieve a lighter, fluffier texture in the layers.
- 250 grams (8 oz) unsalted butter, room temperature – The butter provides the richness and flaky texture we all love in Mil Hojas. Be sure to use unsalted butter for better control over the flavor.
- 3 egg yolks, room temperature – Egg yolks add structure to the dough and contribute to the golden color of your layers.
- ¾ cup milk – A little milk makes the dough soft and pliable, ensuring it’s easy to roll out.
- 1 tablespoon rum or pisco – This adds a subtle depth of flavor. Don’t worry, it’s not overpowering but adds a delicious, traditional touch.
- 1 pinch of salt – Balances the sweetness and brings out the flavor in the dough.
For the filling:
- 3 cups dulce de leche (caramel) – The dulce de leche is the heart of this cake. It’s sweet, creamy, and perfectly complements the crispy layers. If you can’t find it at your local store, check out the Latin supermarkets or use condensed milk if needed.
- 2 ½ cups chopped walnuts – These provide a lovely crunch and a nutty contrast to the sweet filling. You can also swap these for other nuts, like pecans or almonds, if you prefer.
- ¼ cup powdered sugar – A light dusting of powdered sugar on top of the cake adds a beautiful finishing touch, elevating the overall look and flavor.
Pro Tip:
If you prefer a lighter texture, you can substitute part of the butter with chilled puff pastry dough. This will give you a lighter, airier result but won’t change the delicious flavor of your thousand layers.
Once you have everything ready, it’s time to move on to the next step let’s make some magic happen in the kitchen!
3. Step-by-Step Instructions to Make Mil Hojas Cake
Now that you’ve got your ingredients ready, it’s time to bring your Mil Hojas cake to life. Follow these simple steps to create this irresistible dessert. Trust me, once you taste it, you’ll see why this traditional cake is such a crowd-pleaser!
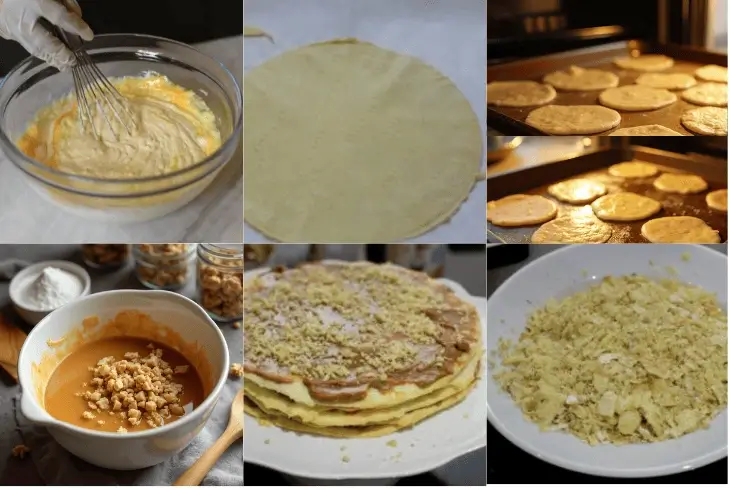
1. Make the dough
- In a large bowl, combine 3 cups sifted flour and 1 pinch of salt.
- Add the 250 grams of unsalted butter in small chunks, along with the 3 egg yolks, ¾ cup milk, and 1 tablespoon rum or pisco.
- Mix the ingredients using a fork, two knives, or a stand mixer with the paddle attachment. Avoid using your hands to keep the dough from getting too warm. The cooler the dough, the flakier your layers will be.
- Continue mixing until the dough forms a medium consistency smooth, but not too sticky.
- Wrap the dough in plastic wrap and refrigerate it for at least 6 hours or overnight. The chilling time helps the dough firm up and makes it easier to roll out.
2. Roll out the dough
- Preheat your oven to 350°F (180°C).
- Divide the dough into 14 equal portions. You’ll be rolling each piece out into thin layers.
- On a floured surface (or use parchment paper or a Silpat mat), roll each piece of dough as thin as possible, about the thickness of a sheet of paper.
- Use a plate or 8-9 inch diameter round cutter as a guide and cut out circles of dough. These will form your layers.
- Pierce each circle of dough with a fork almost entirely across the surface to ensure even baking and to prevent puffing.
3. Bake the dough circles
- Place the dough circles on an ungreased baking sheet.
- Bake for 5-7 minutes, or until the edges turn a light golden color. Keep an eye on them, as the thin dough can bake quickly.
- Let the baked circles cool completely on a wire rack. These crispy layers will form the structure of your Mil Hojas cake.
4. Prepare the filling
- While your dough cools, it’s time to prep the filling.
- In a large bowl, combine 3 cups of dulce de leche with the 2 ½ cups of chopped walnuts. Stir until the walnuts are evenly mixed into the sweet, creamy caramel.
- If you like, you can add a little extra powdered sugar for an even sweeter filling.
5. Assemble the cake
- Once your layers have cooled, it’s time to assemble your Mil Hojas cake.
- Start by placing one layer of dough on a serving plate.
- Spread a generous layer of the dulce de leche and walnut filling on top of the dough.
- Continue layering the dough and filling until all the layers are stacked. Finish with a final layer of dough on top.
- Lightly dust the top layer with powdered sugar to give it that beautiful, classic look.
Pro Tip:
If you’re looking for a more decadent version, you can add a dollop of whipped cream or a drizzle of melted chocolate between the layers. This will take your Mil Hojas to the next level!
There you have it! Your Mil Hojas cake is ready to impress. With its crispy layers, creamy filling, and rich flavor, this cake is sure to become a favorite in your recipe rotation. Let’s move on to the next steps and get ready to enjoy your creation!
4. Pro Tips, Variations, and Customizing Your Mil Hojas Cake
Making Mil Hojas cake at home is a rewarding experience, but a few extra tips can help you elevate this already amazing dessert. Whether you’re looking to streamline the process or get creative with flavors, these suggestions will help you achieve the perfect thousand layers of deliciousness.
1. Perfecting the Dough
- Chill the dough: As mentioned, chilling the dough is key to ensuring your layers stay crisp and flaky. If you’re in a rush, try chilling the dough for a minimum of 1 hour. However, longer chilling time (overnight) allows the dough to relax, which makes it even easier to roll out.
- Don’t skip the fork: When you pierce the dough with a fork before baking, it prevents the dough from puffing up unevenly. This ensures that your Mil Hojas layers stay perfectly thin and crispy.
2. Filling Tips
- Get creative with flavors: While dulce de leche is traditional, you can experiment with different fillings. Try using chocolate ganache, fruit preserves, or even a rich cream cheese frosting. Just make sure the filling isn’t too runny to keep your layers intact.
- Balance the sweetness: If you find dulce de leche too sweet for your liking, try mixing it with a little bit of cream to create a smoother, lighter filling that still retains the delicious caramel flavor.
- Add texture: While walnuts add a great crunch to the filling, feel free to substitute or mix in other nuts like pecans or hazelnuts. If you’re a fan of a little extra texture, crushed biscuits or graham crackers work wonderfully as well.
3. Layering Like a Pro
- Even layers: When stacking the layers, be sure to spread the filling evenly between each layer of dough. You want each bite to have a perfect balance of crispy dough and creamy filling.
- Press lightly: After stacking, gently press down on the layers to help them stick together, but avoid pressing too hard, as you don’t want to compress the layers too much.
4. Decorating Your Cake
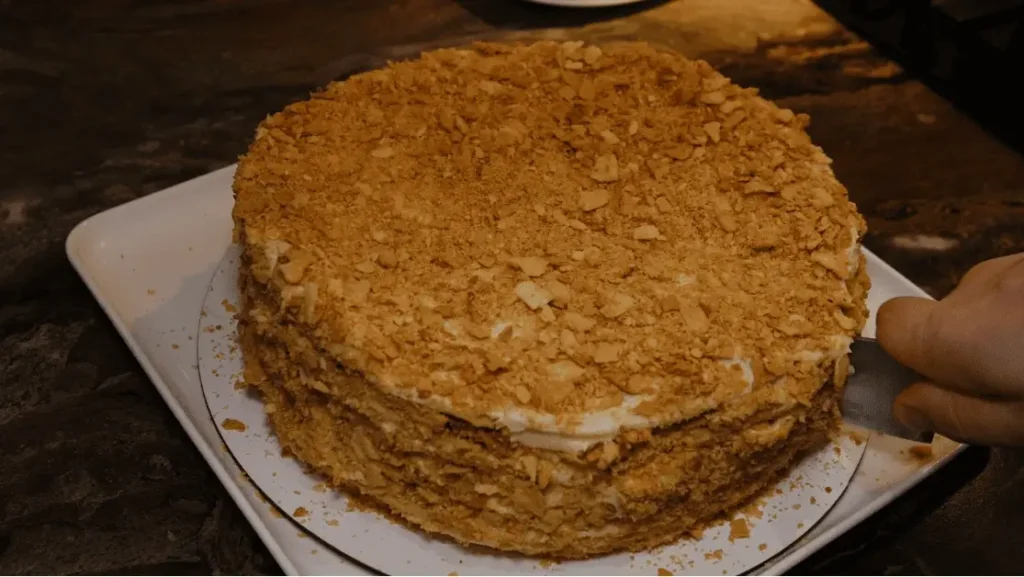
- Dust with powdered sugar: A simple yet effective way to give your Mil Hojas cake a professional look is to lightly dust the top with powdered sugar. Not only does it enhance the appearance, but it also adds a subtle sweetness to the final bite.
- Add a twist with fruit: For a pop of color and freshness, top your cake with sliced strawberries, raspberries, or even a few plum slices. The fruit balances out the richness of the cake, adding a refreshing contrast.
5. Storage and Make-Ahead Tips
- Chill before serving: Once assembled, refrigerate the cake for about an hour before serving.This allows the layers to firm up, making it simpler to slice neatly.
- Make it ahead: The beauty of Mil Hojas is that it can be made ahead of time. In fact, letting it sit overnight in the fridge helps the flavors meld together and gives the layers a chance to firm up.
- Leftovers: If you happen to have any leftovers (though I doubt it!), you can store the cake in the fridge for up to 3 days. It’s best enjoyed fresh, but it will still taste great after being stored.
With these pro tips, you’ll not only make an amazing Mil Hojas cake, but you’ll also be able to put your personal spin on this beloved Chilean dessert. The best part? These variations allow you to make this cake your own while staying true to the traditional layers and rich flavor.
5. Serving Ideas and Pairing Suggestions for Mil Hojas Cake
Once you’ve made your Mil Hojas cake, it’s time to serve and enjoy this delightful dessert! While this Chilean cake is delicious on its own, there are plenty of ways to elevate the experience and make your cake even more special. Whether you’re preparing for a family gathering or a festive occasion, here are some ideas to take your Mil Hojas to the next level.
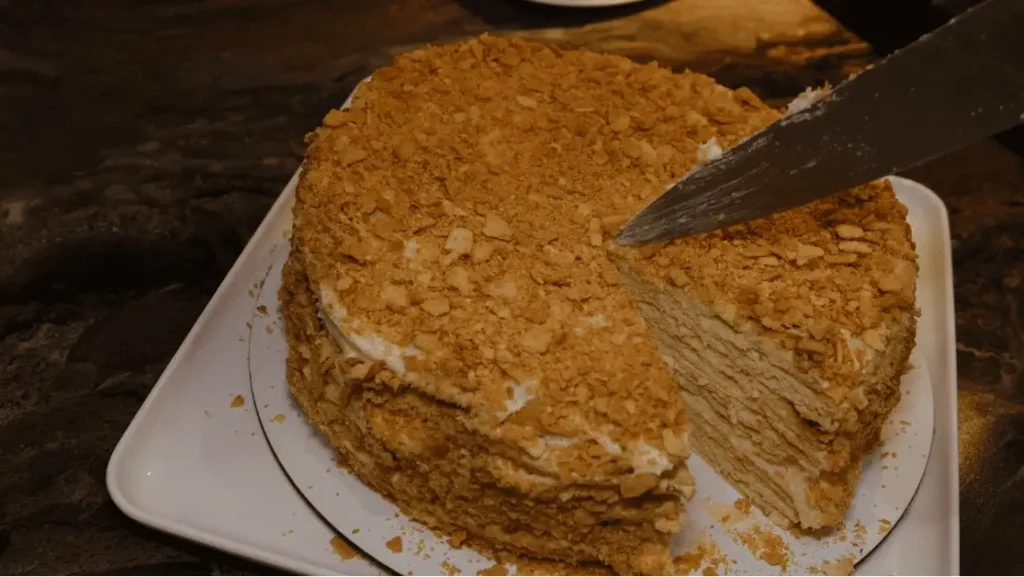
1. Pair with a Hot Beverage
- Coffee or tea: The light, flaky texture of the thousand layers of Mil Hojas cake pairs beautifully with a warm cup of coffee or tea. The rich, creamy filling balances perfectly with the bitterness of a strong coffee or the smoothness of a milder tea, making this a lovely dessert to enjoy after a meal.
- Hot chocolate: For a decadent twist, pair your cake with a rich hot chocolate. The sweetness of the chocolate complements the caramel layers in the cake, creating a truly indulgent treat.
2. Add Fresh Fruit
- Seasonal fruit: To add a refreshing contrast to the sweetness of the dulce de leche filling, consider serving the cake with fresh, sliced fruit. Berries like strawberries, raspberries, or blueberries are perfect, but you can also try slices of plum or rhubarb for a tangy twist.
- Fruit compote: A simple fruit compote made from your favorite fruits, such as chile peaches or apples, can be drizzled over the cake to add an extra layer of flavor and color.
3. Decorate for Special Occasions
- Powdered sugar: For an elegant touch, dust the top of your Mil Hojas cake with a light layer of powdered sugar. It adds a beautiful finish and enhances the cake’s visual appeal, making it perfect for special celebrations.
- Whipped cream: Add a dollop of whipped cream on the side or a swirl on top of the cake for an extra indulgence. The airy cream balances the richness of the caramel, making each bite even more delightful.
- Edible flowers or herbs: For a more artistic presentation, garnish your cake with fresh edible flowers like pansies or mint leaves. These vibrant decorations will make your cake look stunning on any dessert table.
4. Serve with a Scoop of Ice Cream
- Vanilla ice cream: The classic combination of cake and ice cream is always a hit. A scoop of vanilla ice cream next to your slice of Mil Hojas cake will enhance the experience with its creamy, cool texture, balancing the warmth of the freshly baked layers.
- Cakes like Mil Hojas are perfect for pairing with a variety of treats. If you’re looking for another cake idea that’s both adorable and customizable, check out our Bento Cake recipe a fun and trendy option that’s perfect for any occasion.
- Cinnamon ice cream: For something a little different, try pairing your cake with a cinnamon-flavored ice cream. The spice adds complexity and deepens the flavor profile of the dessert.
5. Portion Control Tips
- Slice carefully: When serving Mil Hojas, it’s best to slice gently to preserve the delicate layers. Using a serrated knife or a bread knife will help keep the layers intact, giving each slice a clean, beautiful edge.
- Smaller portions: This cake is rich, so smaller slices are the perfect way to let everyone enjoy it without feeling too indulgent. Pairing it with something light like tea or fruit will make it feel like the perfect ending to any meal.
By experimenting with these serving suggestions, you can easily customize your Mil Hojas cake to fit any occasion or flavor preference. Whether it’s a simple weekday treat or a show-stopping dessert for a gathering, these ideas will add variety and fun to your cake-serving experience.
6. Conclusion: Why Mil Hojas Cake is the Perfect Dessert
Congratulations you’ve just made your own Mil Hojas cake! This traditional Chilean cake with its thousand layers is sure to become a favorite in your recipe collection. Not only does it taste amazing, but it also looks impressive, making it perfect for special occasions or simply when you want to treat yourself to something sweet.
This cake strikes the perfect balance between crispy, flaky layers and the creamy, rich filling of dulce de leche and walnuts. Plus, with all the tips and variations provided, you can customize it to fit your personal taste, whether you prefer a nutty filling or a fruitier twist. It’s an adaptable recipe that can be enjoyed in countless ways, but always with the same delicious result.
Remember, baking is about experimenting and having fun, so don’t be afraid to try different fillings, toppings, or flavor combinations. The more you make this Mil Hojas cake, the more you’ll find little tweaks that make it truly your own.
Now that you have the recipe and all the tips to make it perfect, I hope you’re excited to bake and share this delightful cake with friends and family.
Mil Hojas Cake (Chilean Thousand Layer Cake)
Ingredients
For the dough:
- 3 cups sifted flour
- 250 grams 8 oz unsalted butter, room temperature
- 3 egg yolks room temperature
- ¾ cup milk
- 1 tablespoon rum or pisco
- 1 pinch of salt
For the filling:
- 3 cups dulce de leche caramel
- 2 ½ cups chopped walnuts
- ¼ cup powdered sugar
Instructions
Make the dough:
- In a large bowl, combine 3 cups sifted flour and 1 pinch of salt. Add the 250 grams of unsalted butter, 3 egg yolks, ¾ cup milk, and 1 tablespoon rum or pisco. Mix with a fork, knives, or stand mixer until the dough reaches a medium consistency. Cover the dough with plastic wrap and chill it for a minimum of 6 hours or overnight.
Roll out the dough:
- Preheat the oven to 350°F (180°C). Divide the dough into 14 equal portions. Roll out each portion on a floured surface until thin, about 8-9 inches in diameter. Pierce each circle of dough with a fork to prevent puffing.
Bake the dough circles:
- Place the dough circles on an ungreased baking sheet. Bake for 5-7 minutes, until golden brown. Let cool completely on a wire rack.
Prepare the filling:
- While the dough cools, combine 3 cups of dulce de leche with 2 ½ cups of chopped walnuts. Stir until well mixed.
Assemble the cake:
- Once the layers are cool, begin stacking the dough circles. Spread a layer of the dulce de leche and walnut filling between each dough layer. Finish with a top layer of dough and lightly dust with powdered sugar for decoration.
Chill and Serve:
- Chill the assembled cake for at least 1 hour prior to serving. Slice carefully and enjoy the layers of crispy, creamy goodness!
Notes
Nutrition Information (per serving):
- Calories: 400
- Fat: 22g
- Carbohydrates: 48g
- Protein: 5g
- Fiber: 2g
- Sugar: 25g
- Sodium: 150mg
7. Frequently Asked Questions about Mil Hojas Cake
Before you get started, here are some commonly asked questions about making Mil Hojas cake. These tips will help you troubleshoot any potential issues and ensure your cake turns out perfect every time!
1. Can I make the dough in advance?
Yes, absolutely! The dough for Mil Hojas cake can be made a day ahead. After mixing the dough, wrap it tightly in plastic wrap and refrigerate for up to 24 hours. Chilling the dough not only makes it easier to roll out but also helps achieve that light, crispy texture in the final layers.
2. Can I use store-bought puff pastry instead of making the dough?
If you’re short on time or just looking for a shortcut, store-bought puff pastry can work as a substitute. While it won’t give you the exact same texture as homemade dough, it will still provide that flaky, buttery quality that’s essential for Mil Hojas. Just be sure to adjust the baking time, as puff pastry tends to bake faster than homemade dough.
3. How do I know when the dough layers are baked properly?
The dough layers should be golden and crispy, but not too dark. Keep an eye on them while they bake 5-7 minutes is usually the perfect time for a golden finish. If you’re unsure, you can always cut one circle in half to check if the layers are crisp and not doughy in the middle.
4. What can I use if I can’t find dulce de leche?
If dulce de leche is hard to find, you can use caramel sauce or even make your own at home by simmering sweetened condensed milk. Another option is to substitute with a thicker jam, like apricot or plum. These alternatives will still give you that rich, sweet filling that pairs perfectly with the crispy layers.
5. Can I make this cake gluten-free?
Yes, you can! Replace the all-purpose flour with a gluten-free baking flour blend. Be sure to add a little xanthan gum or another binding agent to help give the dough structure. The texture might be slightly different, but you’ll still enjoy the layers of crispness and sweetness.
6. How should I store leftover cake?
If you have leftovers (though I doubt you will!), store your Mil Hojas cake in an airtight container in the fridge for up to 3 days. The layers will soften a bit over time, but the flavor will still be delicious. To enjoy it at its best, serve within a day or two of making it.
7. Can I freeze Mil Hojas cake?
Yes, you can freeze the layers separately. Wrap each layer of dough tightly in plastic wrap and freeze for up to 3 months. When you’re ready to use them, simply thaw the dough overnight in the fridge before assembling the cake. However, once the Mil Hojas cake is assembled, it’s best served fresh, as freezing can affect the texture of the filled layers.
8. What are some variations to try with this recipe?
There are many ways to put your own twist on Mil Hojas cake:
Flavor the filling: Add a bit of cinnamon or vanilla to the dulce de leche for extra depth of flavor.
Try different nuts: If walnuts aren’t your favorite, experiment with pecans, almonds, or even hazelnuts.
Top with fruit: Try adding fresh berries, strawberries, or a drizzle of fruit jam for a tangy contrast to the sweetness.
These frequently asked questions should clear up any confusion and guide you as you bake your own Mil Hojas cake. Keep in mind that baking is a creative process, so feel free to have fun and try out different flavors. Enjoy the process, and don’t be afraid to make this cake your own!

