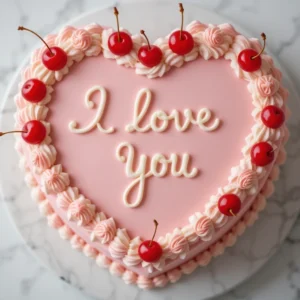
Stunning Vintage Heart Cake
Learn how to make a stunning vintage heart cake with this easy recipe! Perfect for celebrations, it's a delicious and beautiful dessert for any occasion.
Ingredients
For the Cake:
- 2 cups all-purpose flour or gluten-free option: 2 cups of King Arthur Flour Gluten-free Measure for Measure Flour
- 1 1/4 teaspoons salt
- 2 teaspoons baking powder
- 4 large eggs room temperature
- 1 3/4 cups granulated sugar
- 1 1/2 teaspoons vanilla extract
- 1 1/2 teaspoons lemon extract or use more vanilla extract for a more classic flavor
- 1 cup of milk use whole milk or any milk of your choice
- 2 tablespoons lemon zest optional, for a citrusy kick
- 1/4 cup unsalted butter cut into small pieces
- 1/3 cup canola or vegetable oil
For the Frosting:
- 2 1/2 8-ounce packages full-fat cream cheese (room temperature)
- 1 cup + 2 tablespoons unsalted butter very soft, not melted
- 3 cups powdered sugar
- 1 teaspoon vanilla extract
- Pinch of salt
- Pink food coloring for a lovely blush tone
For the Garnish:
- Maraschino cherries for that perfect finishing touch
Instructions
Step 1: Preheat and Prepare Your Pans
- Start by preheating your oven to 335°F (168°C). While it’s warming up, line two 8-inch round cake pans with parchment paper. This ensures the cake layers come out clean and easy to remove from the pans.
Step 2: Mix Dry Ingredients
- In a medium bowl, whisk together 2 cups of all-purpose flour, 1 1/4 teaspoons salt, and 2 teaspoons baking powder. Set this bowl aside – these are your dry ingredients.
Step 3: Beat the Wet Ingredients
- In a large bowl, use an electric mixer or stand mixer to beat the 4 eggs, 1 3/4 cups sugar, 1 1/2 teaspoons vanilla extract, and 1 1/2 teaspoons lemon extract on medium-high speed. Mix for about 2 minutes until the mixture becomes thick and a light golden color. This is the base for your fluffy cake!
Step 4: Combine Dry Ingredients and Wet Ingredients
- Add the dry ingredients to your egg mixture, beating on low speed just until combined. Be careful not to overmix – you want to preserve the light texture of the cake. Use a spatula to scrape the sides of the bowl, ensuring all the ingredients are fully mixed together.
Step 5: Heat the Milk Mixture
- In a small saucepan, heat 1 cup of milk and 2 tablespoons of lemon zest (if using) over medium heat. You don’t want it to boil – just heat it until you see small bubbles forming around the edges. The temperature should be around 180-185°F (82-85°C).
Step 6: Add Milk and Oil to the Batter
- Once the milk mixture is ready, slowly pour it into the cake batter while mixing on low speed. Add the 1/4 cup of butter and 1/3 cup of canola oil. Mix until everything is combined and smooth. This will make your cake extra moist and tender.
Step 7: Divide and Bake
- Evenly distribute the batter between the two prepared pans. You should have about 580 grams (or 2 3/4 cups) of batter per pan. Bake the cakes for 33-45 minutes, or until a toothpick inserted into the center comes out clean. The tops should be set and lightly golden.
Step 8: Cool the Cakes
- Allow the cakes to cool in the pans for approximately 15 minutes. Afterward, turn them out onto a wire rack to cool completely, which should take around 2 hours. At this point, the cake might feel slightly dry, but don’t worry – it’ll become more moist as it cools.
Step 9: Prepare the Frosting
- As the cake layers cool, begin preparing your frosting. In a large bowl, beat together 2 1/2 packages of cream cheese and 1 cup + 2 tablespoons of unsalted butter. Mix until smooth and creamy.
- Gradually add 3 cups of powdered sugar, and continue beating until well combined. Add 1 teaspoon vanilla extract and a pinch of salt. If you want to create that beautiful pink frosting, add a few drops of pink food coloring until you reach your desired shade.
Step 10: Assemble the Cake
- Once the cakes are completely cool, it’s time to assemble. Place one cake layer on a cake plate or cake drum. Spread about 3/4 cup of frosting evenly over the top.
- Add the second cake layer, flat side up. Here’s where the fun part comes in: using a ruler or eyeballing it, cut the sides of the cake to create the rounded top of the heart shape. Attach the cut-off pieces to the main cake using a little frosting to help form the heart shape.
Step 11: Crumb Coat and Chill
- Spread a thin crumb coat over the entire cake, covering the sides and top with a light layer of frosting. This helps seal in any crumbs before the final frosting layer. Chill the cake in the fridge for 30-60 minutes or freeze it for about 30 minutes until the crumb coat firms up.
Step 12: Frost and Decorate
- Once the crumb coat is firm, apply a second layer of frosting. Use about 1 cup of frosting for the sides and 3/4 cup for the top. Smooth out the frosting with a spatula or offset spatula.
- For an extra decorative touch, use the remaining frosting to pipe a shell border around the edges using a piping bag and Wilton tip. You can also pipe small decorative dots or lines to create beautiful designs.
Step 13: Garnish and Serve
- To finish your vintage heart cake, garnish with maraschino cherries or fresh berries like raspberries for added color and flavor. Then, slice and enjoy!
Notes
Nutrition Information (per serving):
- Calories: 350
- Fat: 18g
- Saturated Fat: 9g
- Carbohydrates: 47g
- Fiber: 1g
- Sugars: 35g
- Protein: 3g
- Sodium: 240mg
- Cholesterol: 80mg